Hacking public transport APIs - written by NiXijav on 2018-09-24

Living in Santiago de Compostela or Vigo? Then this post is for you.
If you're usually using public transport, it's useful knowing when your bus is going to arrive. For this reason, I've created a website and a telegram bot.
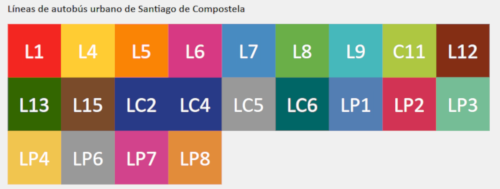
For Santiago's public transport there are two options. The first one, buscq.com. Aimed for desktop devices, you'll be able to select your desired stop inside each bus line. Currently, it doesn't support searching. You have to know where you're going!

Buscq.com main menu
You also have @buscq_bot on Telegram. It only has one command, /parada. As a parameter, either the stop number or stop name are accepted.

Search by stop ID

Search by stop name
If your name search yields more than a result, a disambiguation message will be shown.

Disambiguation dialog
If you don't know where you are, you can send your current location, and the 10 nearest stops will be returned. You can then use /parada with the name or id.
On the other hand, if you're living in Vigo, there is @vitrasa_bot, also on Telegram. It works just like the Santiago one, but with Vigo data (obviously). It'll return 15 results instead of 10 in disambiguations and nearest stops
Fun fact: there are 580 bus stops in Santiago and 1192 in Vigo.
Source code for buscq and buscq_bot is available here, under the GPLv3Source code for vitrasa_bot is available here, also under the GPLv3
Repurposing an Amazon Dash Button - written by NiXijav on 2018-01-21

The most known, cheapest and best IoT button, repurposed.
Amazon's Dash Buttons are quite incredible. For just $5 you can modernize such a common task as shopping. With a single press, you can order from dishwasher to toilet paper, instantly and effortlessly. These buttons connect via WiFi to Amazon servers, and when they're done, they shut themselves off.
Taking advantage of this, we can easily repurpose them for all of our IoT needs, in a cheap way. The process is as follows:
- When the button is pressed, it connects to the WiFi access point
- We detect that connection
- We act accordingly
Simple, isn't it? Let's get it working
First we have to configure the button. For this we'll follow Amazon's instructions, but when prompted to choose a product to order, just quit the app, so no product will be ordered.
We'll also need the button's MAC address. With this code, every device connecting to the network will be displayed. Just run it and click the Dash Button a few times.
from scapy.all import *def arp_display(packet):
if packet[ARP].op == 1:
print('ARP Probe detected: ' + packet[ARP].hwsrc)
sniff(prn = arp_display, filter = 'arp', store = 0, count = 0)

We've got the MAC address. Great! Now, slightly modifying the code, like this:
from scapy.all import *def arp_display(packet):
if packet[ARP].op == 1:
if packet[ARP].hwsrc == '50:f5:da:df:0b:80': # change this
print('Button has been pressed!')
sniff(prn = arp_display, filter = 'arp', store = 0, count = 0)
Will make the code only react to the Button's address.

With this, now it's just a matter of tailoring the script to suit your personal needs. From sending an email to controlling another IoT appliance, the possibilities are endless.
Simplifying the MCP23017 - written by NiXijav on 2016-03-01

Library for the Raspberry Pi written in Python that simplifies the use of the MCP23017, a 16 bit GPIO expander
The MCP23017 is a very useful IC. It provides 16 GPIOs, and it's ideal for expanding the ports of a Raspberry Pi. It even includes pullup resistors for each pin, and all of this using i2c.
You can find the datasheet for this chip here
But all this benefits come at a price. It is not easy to use, or at least, not easy to use initially. The MCP23017 operates entirely based on registers (Page 9 of the datasheet), and depending on which register you are writing to, you'll be able to change the direction of the pins, state, pullups... Also, GPIOs are divided into two different banks, and they are independent from each other.
To simplify this boring register thing, I created a library, in Python, for the Raspberry Pi. Commands are almost the same as the RPi.GPIO ones.
Here is the pinout the library uses:

A very simple code example:
```import mcp23017_lib as MCP
MCP.start(0x26)
MCP.setup(2, MCP.IN, MCP.PUHIGH)
MCP.setup(1, MCP.OUT)
while 1:
if(MCP.input(2)):
MCP.write(1, MCP.HIGH)
else:
MCP.write(1, MCP.LOW)
```
This example will set pin #2 as an input, with the pullup resistor enabled and #1 as an output. When the input goes high, pin #1 will also go high.
You can find the library here. It is licensed under the GPLv3.
If you found this library useful, and/or have suggestions, please let me know in a comment :3
